cherry pie by Nate Everett

DSC_0011-3.jpg

Summer is here. The advent of farmers markets, balmy weather, sunshine and poolside lounging has got me looking forward to the next three months with great relish. And, of course, it is the time of year for my favorite dessert: pie! It's almost pride weekend here in DC and I wanted to kick it off Spice & Hutch style by baking a scrumptious pie that pays homage to DC's iconic cherry blossoms. 

DSC_0009.jpg

The pie dough recipe in this post belonged to my great grandmother Thor. It's been passed down through generations; it's the recipe I grew up with; and I love it so much that I wanted to share it with the world! Note that the pie dough may be a tad stickier and harder to manage than other pie doughs you have made. But this recipe produces the richest and flakiest pie crust I've ever had. I think you'll enjoy it, too :)

DSC_0008-4.jpg

recipe 

for the pie crust:

  • 3 cups all-purpose flour
  • 1 tsp salt
  • 3 tbsp sugar
  • 1 1/2 cup chilled vegetable shortening
  • 1 egg
  • 1 tsp white vinegar
  • 5 tbsp ice cold water

for the pie filling:

  • 5 cups sweet cherries, washed and pitted
  • 3 tbsp quick-cooking tapioca
  • 1 cup sugar
  • 1 to 2 tbsp unsalted butter
  1. Mix together the flour, salt and sugar.
  2. Cut in the vegetable shortening and continue mixing until the dough forms pea-sized clumps.
  3. In a separate bowl, beat the egg and then add the ice water and vinegar. Mix to combine. Add to the dry ingredients.
  4. Mix the dough lightly with a fork to combine the dry and wet ingredients.
  5. Turn out onto a lightly-floured work surface and knead the dough a couple of times. Divide into two equal parts.
  6. Smush down each portion into a 1-inch thick disk. Wrap each disk in plastic wrap and put in refrigerator for at least 30 minutes to firm up the butter. You can refrigerate the dough for up to two days. Proceed with step 7 when ready to make the pie.
  7. Preheat the oven to 450°.
  8. To make the pie filling, mix together the tapioca and sugar and blend until smooth. Using your hands, gently toss and coat the cherries with the tapioca mixture. Allow the cherries to sit for 15 minutes.
  9. Roll out one disk of pie dough into a circle about 1 1/2 inches larger than the diameter of the pie tin. Drape the dough over the pie tin, pushing the dough against the sides and bottom of the tin.
  10. Pour in the cherry mixture. Dot with the butter. 
  11. Roll out the second disk and drape it over the pie. Remove the excess dough. Use a fork or your fingers to create a decorative trim. Use a knife to carve a decorative pattern or shape on top of the pie. 
  12. Bake the pie in a 450° oven for 10 minutes, then reduce the heat to 350° and bake for about 40 to 45 minutes, or until the top has achieved a golden brown and the cherry mixture is bubbling gently.
DSC_0016.jpg

If you make this recipe, hashtag a pic to #spiceandhutch and post to Instagram, Facebook and/or Twitter. I'd love to see your culinary creations!

chocolate chip cookies by Nate Everett

DSC_0014-2.jpg

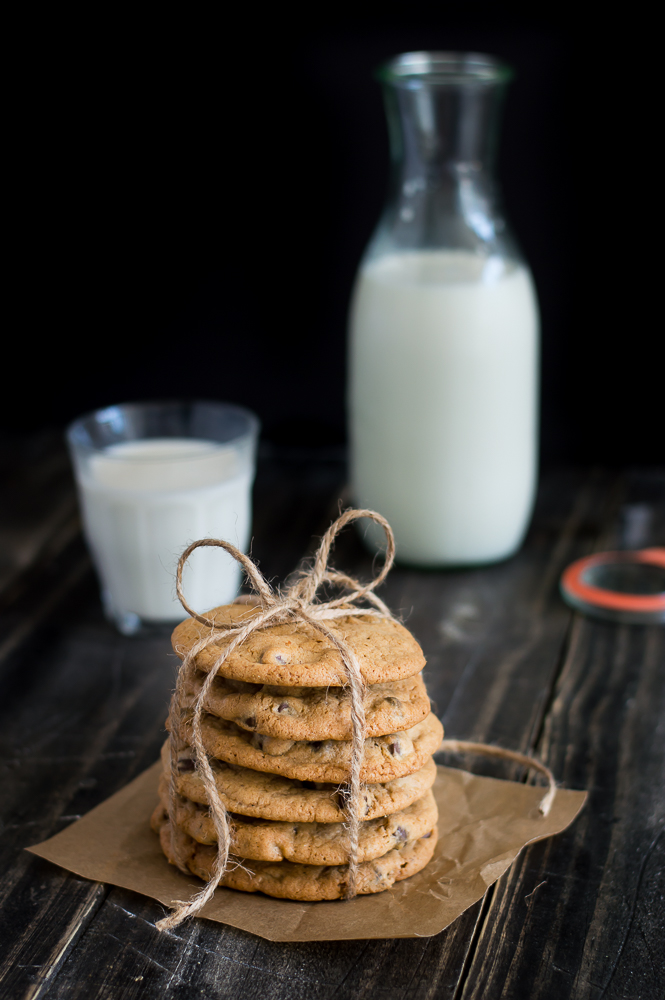
There's something about chocolate chip cookies that hearkens back to an earlier time. A time when I brought my lunch to school in a brown paper bag filled with cookies, a turkey sandwich on white Pepperidge Farm bread, Lay's potato chips, and a bottle of ice-cold lemonade. These were the lunchtime staples of my childhood. When I arrived home from school, I used to make a beeline for the kitchen to find a fresh batch of my mother's chocolate chip cookies resting a cooling rack. 

DSC_0004.jpg

Perhaps it is the history behind the chocolate chip cookie that conjures up nostalgic thoughts of an even earlier time. In 1938, Ruth Graves Wakefield invented the cookie when she owned the Toll House Inn in Massachusetts. The cookie was an instant classic. It became a wildly popular treat in households across America after she brokered a deal with Nestlé® to publish her recipe on bags of Nestlé's® semi-sweet morsels (a.k.a, chocolate chips). Hence, the Toll House® cookie. Since that time, thousands of variations of that recipe have hit cookbooks and the Internet as chefs, bloggers, and food writers develop recipes of their own and incorporate creative additions like bacon bits and rock salt. I, for one, prefer the basics.

DSC_0009-2.jpg

This recipe is similar to Ruth's classic creation, but I call for more brown sugar and I omitted the nuts and vanilla extract. This recipe produces rich, gooey, sugary, chocolate chip cookies which you can enjoy with a cold glass of milk. I enjoyed several cookies yesterday (read: twelve). My insatiable sweet tooth has not dimished with age...

DSC_0052.jpg

recipe

  • 12 ounces bittersweet chocolate chips
  • 2 large brown eggs
  • 1 cup packed brown sugar
  • 2 sticks unsalted butter, diced and at room temperature 
  • 2 1/3 cup plus 1 tbsp all-purpose flour
  • 3/4 cup sugar
  • 1 tsp kosher salt
  • 3/4 tsp baking soda
  1. Preheat the oven to 350°.
  2. Sift the flour and baking soda into a mixing bowl and whisk in the salt by hand. 
  3. Cream the butter. Attach a paddle to a stand mixture and add the butter and sugars to the bowl. Beat on low speed until ingredients are evenly-combined. Add the eggs, one at a time, and beat the mixture for several minutes. Scrape down the sides of the bowl as needed. The mixture will lighten in color and form a smooth paste.
  4. Add the dry ingredients to the sugar-butter-egg mixture. Beat on low speed until the ingredients have completely blended together. Add the chocolate chips and beat for a minute longer.
  5. Line two baking sheets with parchment paper. Scoop a heaping tablespoon of the cookie dough from the bowl, form it into a ball, and place it on the parchment paper. Repeat. And be sure to leave a couple of inches of space in between each ball of dough.
  6. Bake the cookies for 12-15 minutes, or until they have achieved a matte golden brown color. 

If you make this recipe, hashtag a pic to #spiceandhutch and post to Instagram, Facebook and/or Twitter. I'd love to see your culinary creations!

DSC_0059.jpg